Attleborough Tile Cleaning

Attleborough Tile Cleaning

Welcome to my Work History archive where you will find examples of the cleaning and renovation of tiles carried out in Attleborough.

Reclaimed Pamment Floor Renovation Gissing

Renovating Heavily Soiled Reclaimed Pamment Tiled Flooring in Gissing

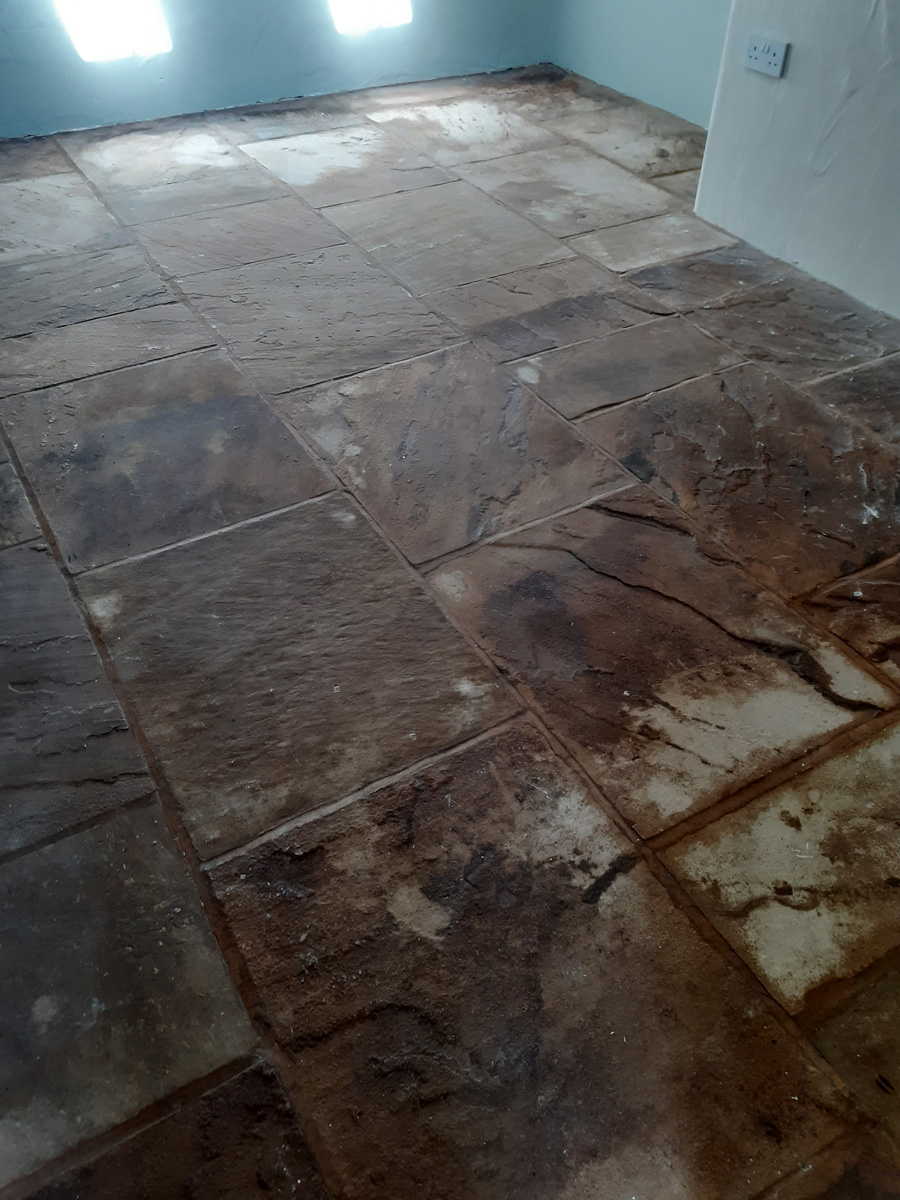
I was contacted by clients with a Pamment Tiled Flooring who were living in Gissing, a small village in the centre of South Norfolk which has a long history dating back to Saxon times. The Pamments were reclaimed suffering from heavy soiling and in need of considerable expert attention. All the old protective coatings had pretty much worn completely off the surface of the tiles which had then allowed many years of dirt to become ingrained in the pores of the clay, making it almost impossible to clean for the homeowner using ordinary methods.

Reclaimed Pamment Floor Before Cleaning Gissing

Pamment tiles were very popular in older Norfolk homes; they are made from locally sourced clay and, like terracotta, are extremely porous and therefore need to be thoroughly sealed against fluids and general soiling. When correctly cleaned and sealed, they are quite versatile and can be used for internal floors as well as external areas such as patios and pathways.

Cleaning a Pamment tiled floor

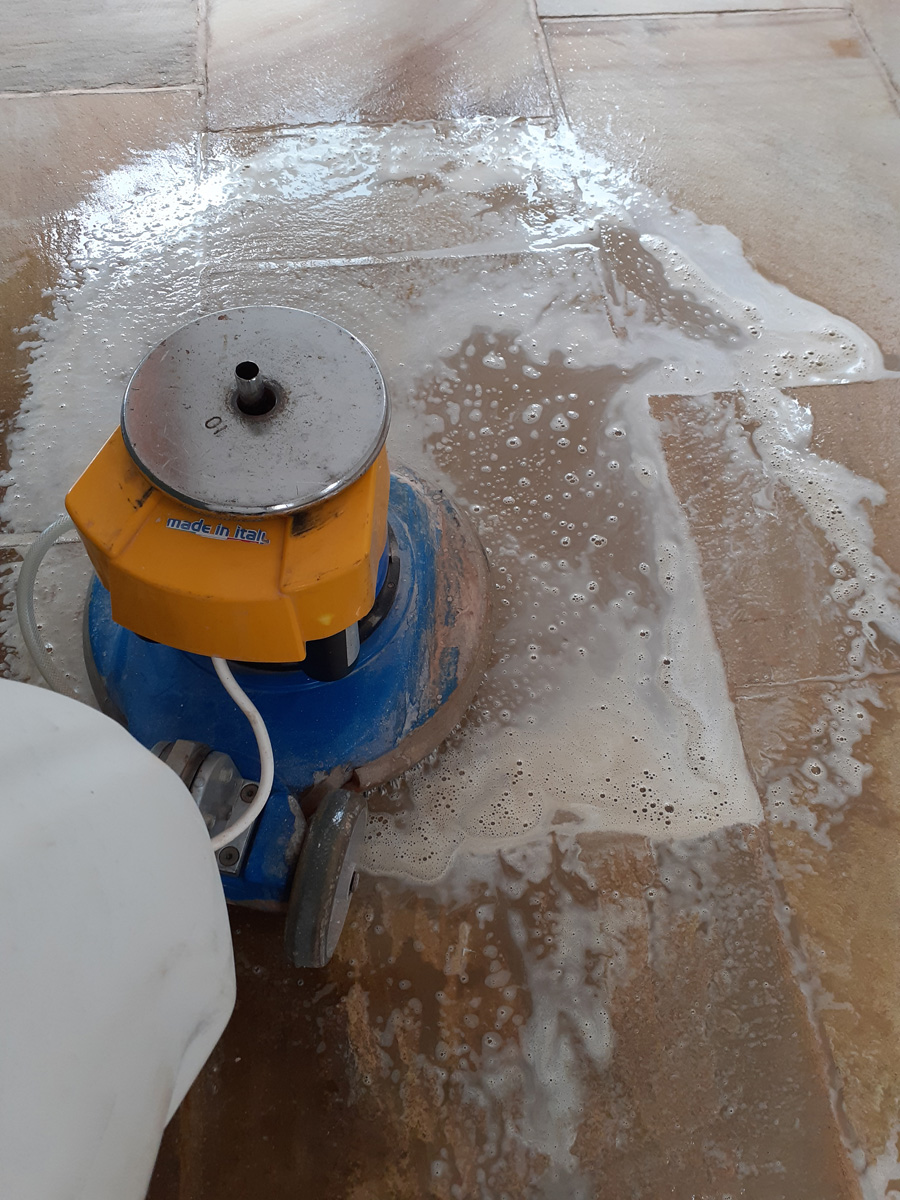
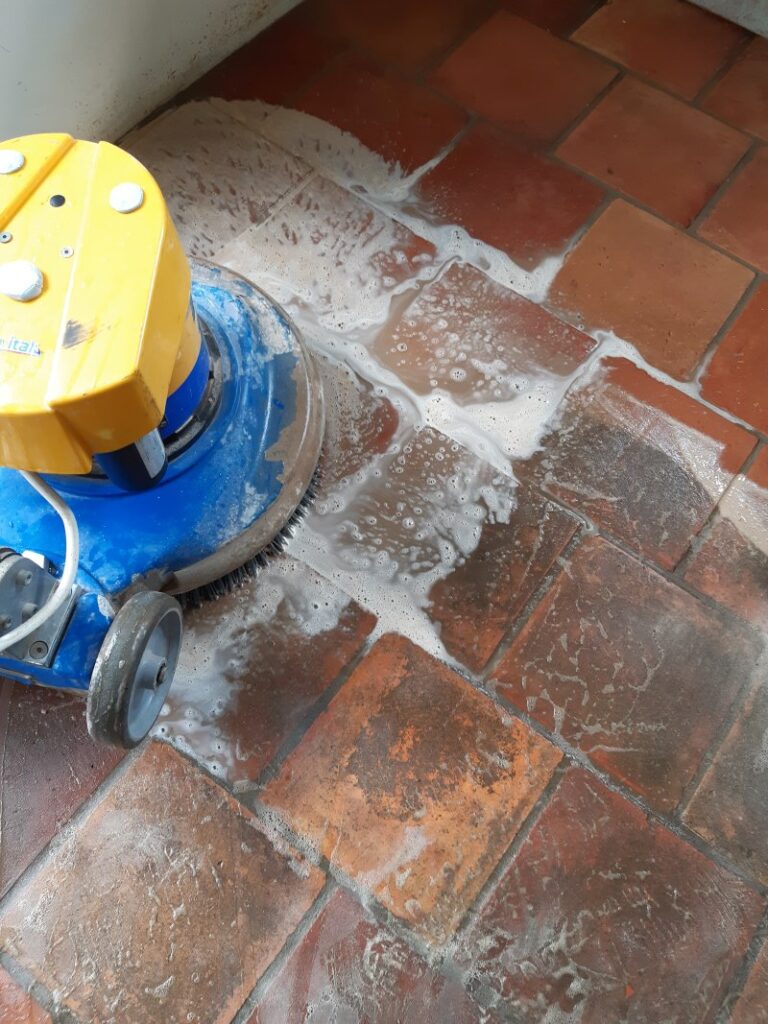
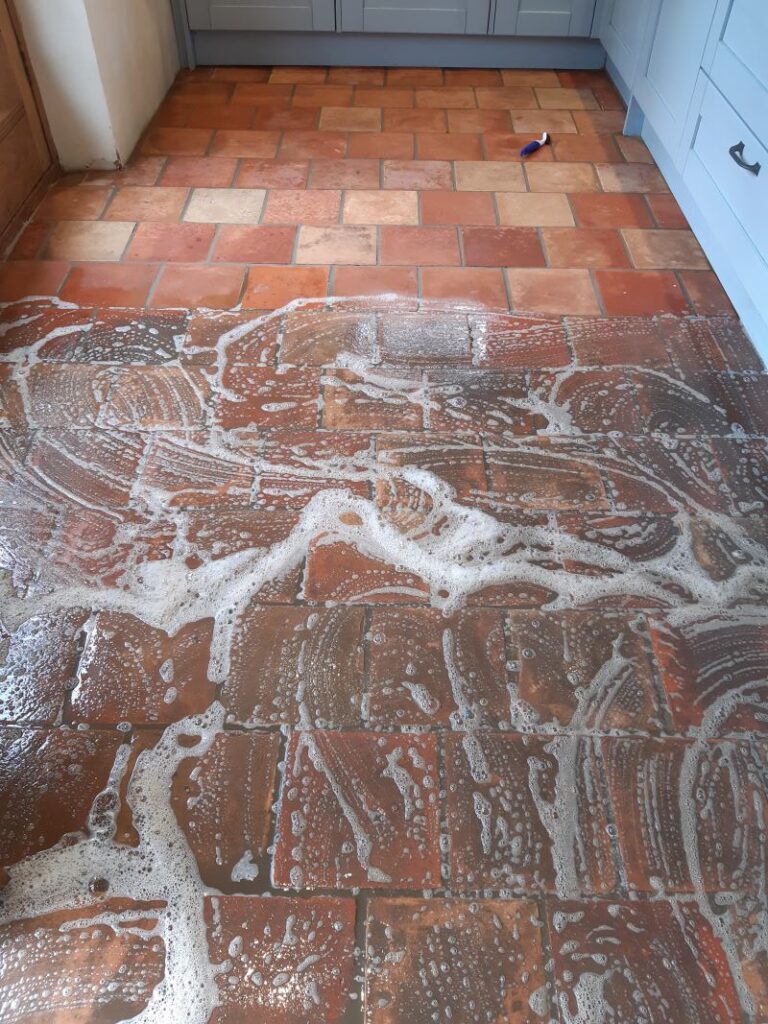
To remove all traces of the old sealers and clean the tiles I decided to apply Tile Doctor Remove & Go, which was diluted with water to form a medium strength solution. I applied a generous coat of this solution to the floor, leaving it to soak into the pores of the tiles for approximately ten minutes. The solution was then worked into the Pamments using a Black nylon scrubbing pad fitted to a 17″ rotary machine. Remove & Go is a powerful and versatile cleaner which is safe to use on natural stone floors, kiln-fired tiles and all types of grout.

Reclaimed Pamment Floor During Cleaning Gissing Reclaimed Pamment Floor During Cleaning Gissing

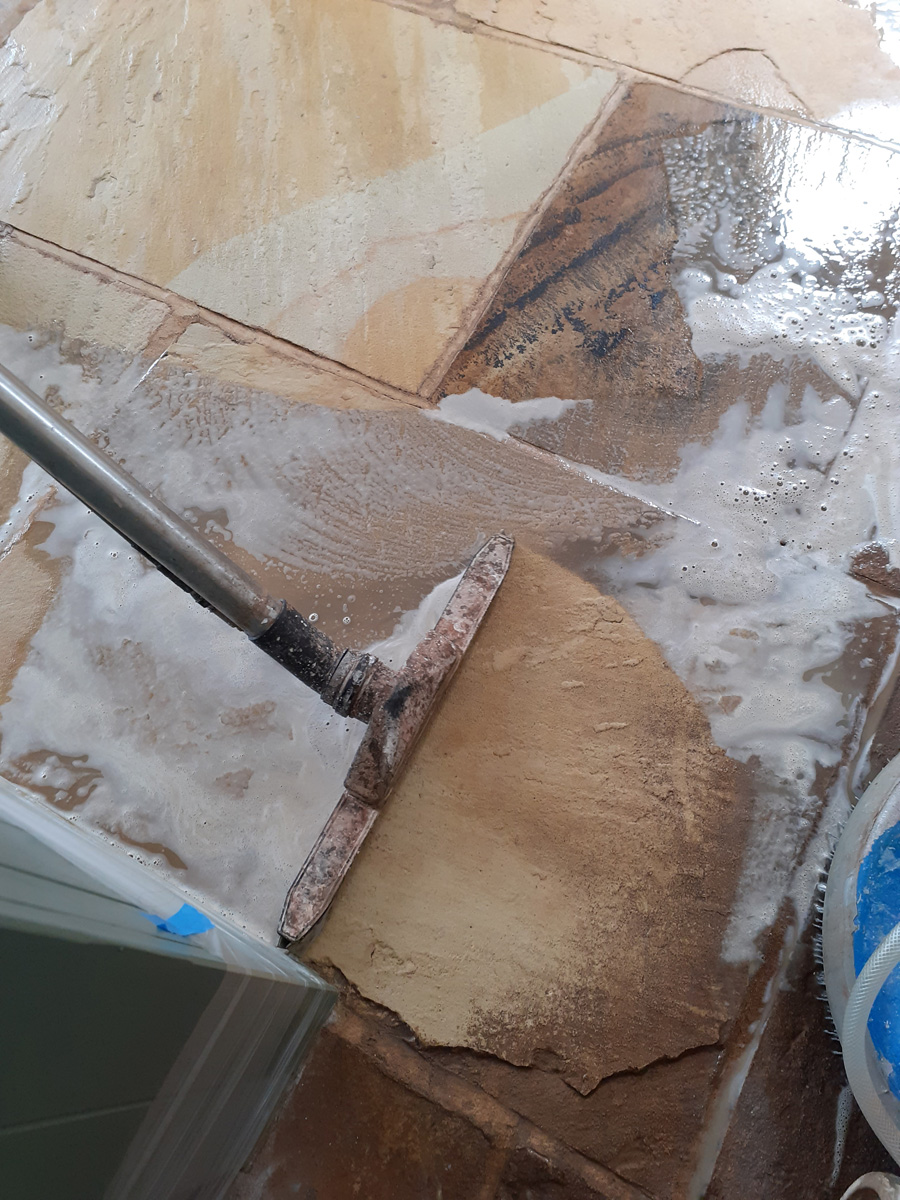
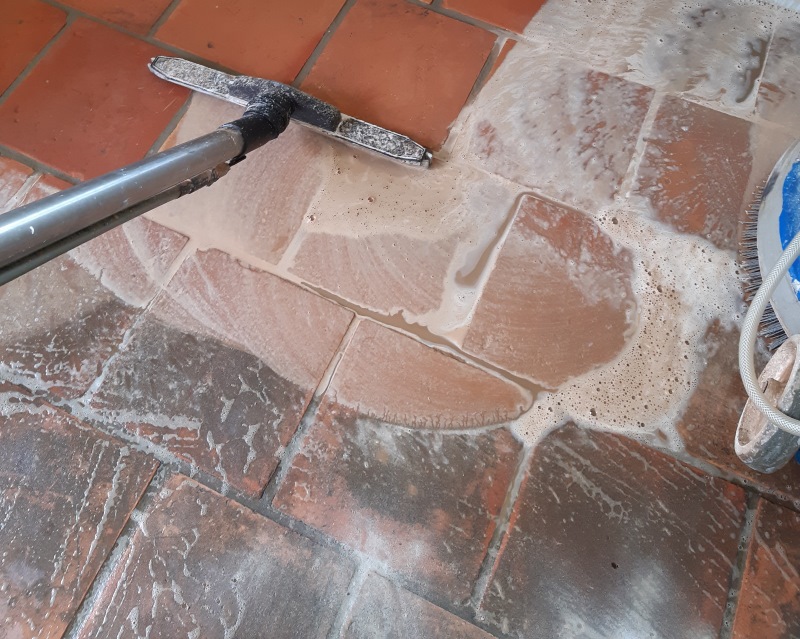
I rinsed the solution off the floor with clean water once it had worked its magic and extracted the resulting dirty residue with a wet-vacuum machine. In order to tackle some particularly stubborn stains, I repeated this process until I was satisfied that the floor had been cleaned to the highest standard possible.

Reclaimed Pamment Floor During Cleaning Gissing

The whole area was then given an acid wash using a dilution of Tile Doctor Grout Clean-Up. This further cleans the tiles to remove old grout stains and neutralises the pH level of the floor following the use of alkaline cleaning products, lastly it also ensures optimal adhesion of the new sealer.

The floor was then left to dry overnight before returning the next day to complete the seal. I left a dehumidifier running overnight to assist the drying process and ensure that the floor would be completely dry on the following day. It’s imperative that a tiled floor is completely dry before sealing as any excess moisture left in the floor can potentially adversely affect the overall performance of the sealer as it evaporates.

Sealing a Pamment tiled floor

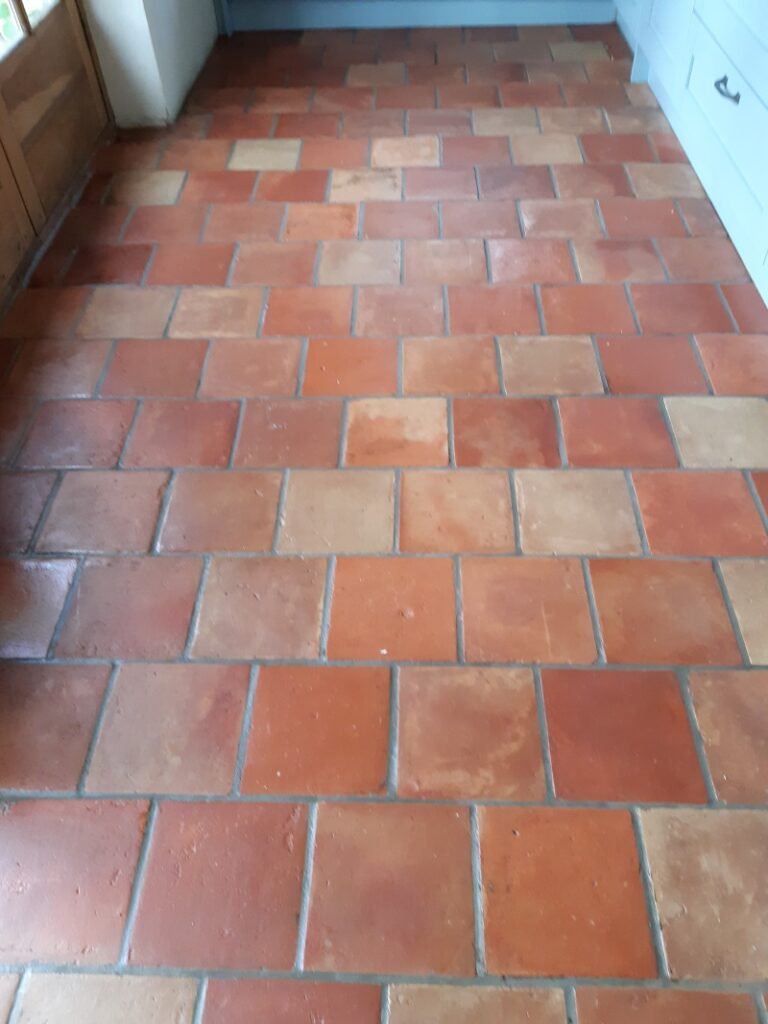
To seal and protect the Pamment tiles I applied a total of five coats of Tile Doctor Seal & Go, which provided a robust, durable surface seal along with an aesthetically pleasing, mid-sheen finish (as you can see from the photos). Seal & Go is the go-to sealer for internal, unsealed porous surfaces such as Terracotta, Sandstone or Slate.

Reclaimed Pamment Floor During Sealing Gissing

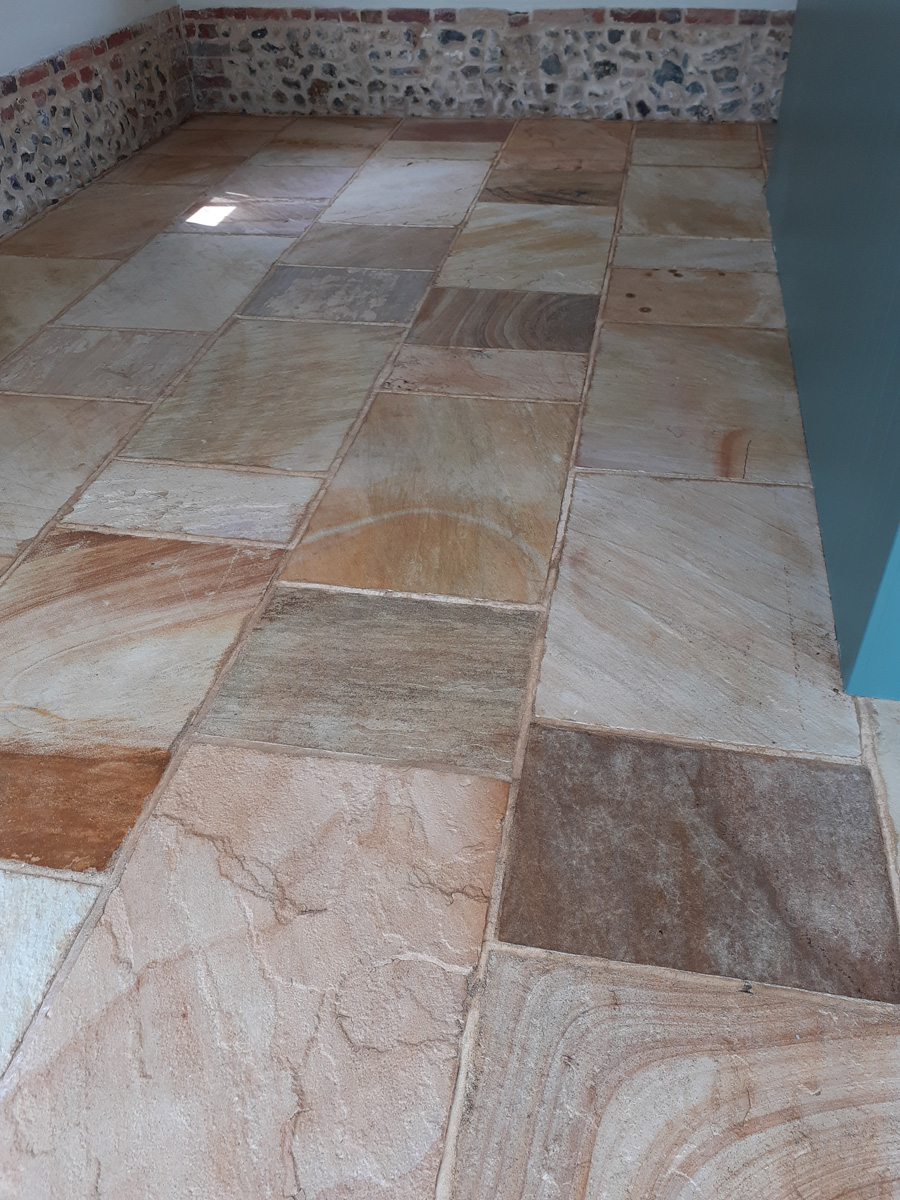
The clients had left us to work our magic over the two days, returning at the end of the sealing day and were absolutely staggered at the results we had achieved with a floor they had thought beyond help.

Reclaimed Pamment Floor After Renovation Gissing

For aftercare cleaning I recommended the use of Tile Doctor Neutral Tile Cleaner, it’s a gentle yet effective product that won’t upset the sealer which can be the problem with many of the stronger products you find in supermarkets.


Deep Cleaning and Restoration of Reclaimed Pamment Tiles in Norfolk

Renovating Heavily Soiled Reclaimed Pamment Tiled Flooring in Gissing Read More »

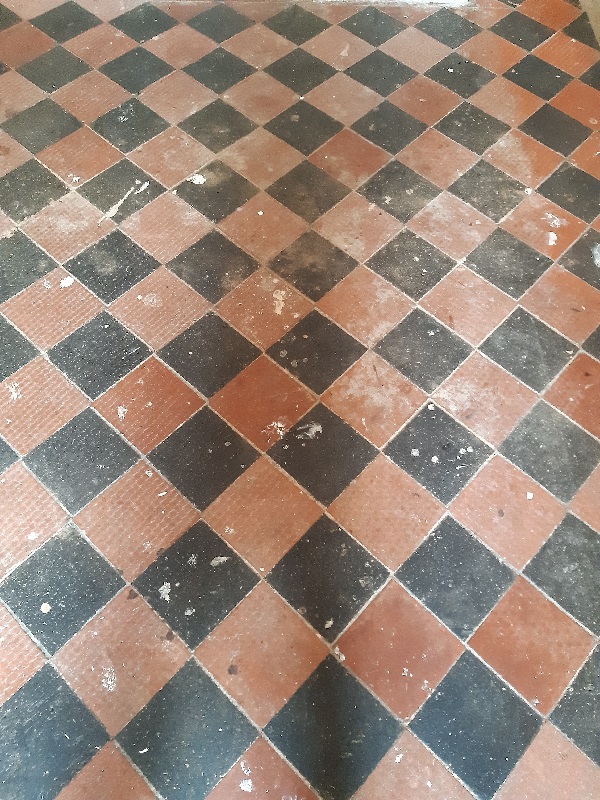
Stained Victorian Hallway Floor Renovation Attleborough

Renovation of a Victorian Tiled Hallway in Attleborough following Building Work

A client in the town of Attleborough, Norfolk contacted us about her Victorian tiled hallway following a recommendation from a neighbour. She wanted to get the floor renovated and had been struggling to find someone with the appropriate knowledge and experience to complete the work. She had tried to clean the floor herself but had little success and decided it was time to call in the experts.

Stained Victorian Hallway Floor Tiles Before Cleaning Attleborough

The whole house was being renovated and unfortunately the contractors working in the property had not taken care to cover up the hallway floor and it has subsequently become covered in all sorts of mess including a lot of plaster and paint. I explained that this would not be an issue and we were confident that we could remove all the contaminants and restore the floor to its former glory.

I created a quote for doing the renovation which would take two days, one to clean and one to seal. Happy with my quotation, we scheduled a date for our return which was to follow the conclusion of all remaining building works.

Deep Cleaning a Victorian Tiled Floor in Attleborough

Before starting the renovation of her floor, our first job was to cover the walls and skirting with masking film to protect the newly plastered walls from splashes during cleaning. Next, with a focus on removing the paint splatters, a generous quantity of Tile Doctor Remove & Go was sprayed onto the tiles and left to dwell for ten minutes so it could get to work breaking down the dirt and softening the paint. Then using a black scrubbing pad fitted to our Klindex rotary buffing machine, the solution was scrubbed into the surface to remove as much of the contaminants and old now-ineffective coatings as possible. Once done, the resulting slurry was extracted away using an industrial wet vacuum.

The next step was to treat the floor to an acid scrub using Tile Doctor Acid Gel which was applied and left for five minutes before working in with a coarse 100-grit diamond pad. This treatment has a lot of benefits for tiled floors and is great for removing old cement, grout smears and other contaminants such as efflorescence salt deposits. Being acidic it also neutralises the pH of the floor following the use of Remove and Go earlier which is a strong alkaline. The floor was then wet vacuumed again and the process repeated with a finer 200-grit pad.

Sealing a Victorian Tiled Floor in Attleborough

The floor was left to dry out overnight and then on our return it was tested with a damp meter to ensure it had dried and was now ready for sealing. The moisture readings were good, so we were happy to go ahead and apply the sealer.

We had discussed finish options with the customer earlier and as a result Tile Doctor Seal & Go Extra was chosen. This is a fully breathable exterior grade product which provides high stain resistance and is perfect for high traffic areas such as hallways. It improves the colours in the tiles and has a low sheen finish so does not make the floor look too shiny. Five coats of sealer were applied leaving each one to dry before the next was applied.

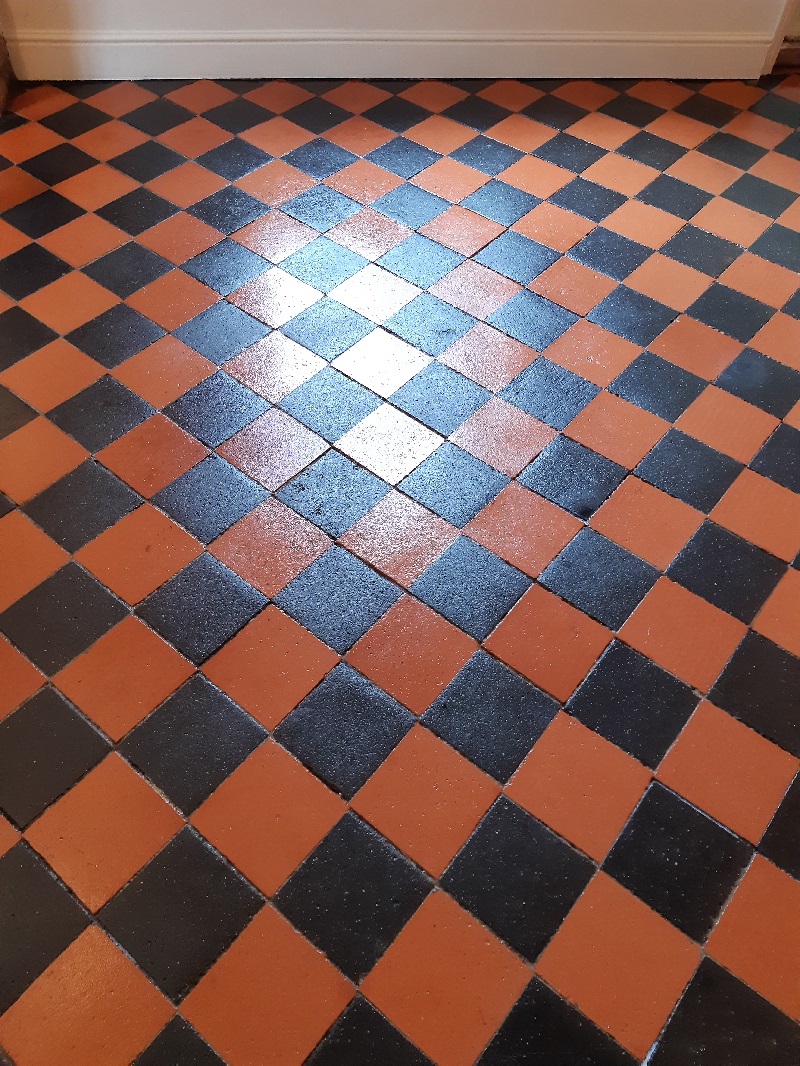
Stained Victorian Hallway Floor Tiles After Cleaning Attleborough

My client was amazed how well her floor had come up and was delighted that the building contractors had not permanently ruined it! For aftercare cleaning I recommended the use of Tile Doctor Neutral Cleaner which is a highly effective yet gentle tile cleaning product that doesn’t damage acrylic finishes.


Professional Victorian Hallway Floor Renovation in Norfolk

Renovation of a Victorian Tiled Hallway in Attleborough following Building Work Read More »
Slate Shower Cubicle Renovation Attleborough

Removing Grout Haze from a Black Slate Shower Cubicle in Attleborough

This customer from Attleborough had a new shower installed with the walls clad in beautiful Black Slate tiles. Unfortunately, the installation of the tiles didn’t go according to plan and the Slate became stained with white crusty patches. The staining was completely resistant to any type of cleaning or limescale removal product leaving what was meant to be a very opulent shower cubicle looking very un-inviting.

Despite numerous consultations with the contractor, they were unable to resolve the problem or offer any solution that would renovate the stone and make it look as originally intended. Desperate for a solution she searched the internet, discovered Tile Doctor and I was asked to take a look and see what could be done. Attleborough is only about ten miles from my base in Norwich so its wasn’t long before I was able to pop round.

Slate Shower Cubicle Before Renovation Attleborough

After inspecting the installation, I ascertained that the problem here was two-fold. The primary problem was the installer and left a thin coating of grout on the surface of the Slate tiles. This is a common problem known in the trade as “grout haze” or “grout smears” and is usually removed afterwards by giving the tiles a good wipe down with a sponge. Clearly this wasn’t done sufficiently on this occasion. The second problem was the grout haze had provided the perfect moisture trap for the typical Norfolk hard water. Over a relatively short space of time, this trapped water had left hard limescale deposits which became firmly attached to the grout haze which, in turn, was firmly attached to the tile surfaces.

I mentioned earlier that my client had found that no amount of chemical cleaning could shift it. However, Tile Doctor products are designed for professional use and are far more powerful than those available in supermarkets and DIY stores. I also had available professional stripping and repolishing pads that can re-surface the stone so between the two I was confident of getting a good result and dramatically improving the condition of the shower cubicle walls.

Removing White Stains from a Black Slate Tiled Bathroom

The first job was to apply a liberal coat of Tile Doctor Acid Gel, which owing to its thick consistency, is the perfect choice for dissolving calcium-based contaminants on vertical surfaces. This coat was allowed to dwell on the tiles and in the grout lines for around thirty minutes with periodic agitation using a firm bristled grout and scrubbing brush. The solution was then rinsed off with clean water.

The process removed a considerable amount of the limescale but there was still a fair amount visible on the tiles particularly around the tap fittings. A further coat of Acid Gel was applied and again allowed to dwell for another thirty minutes before scrubbing vigorously using a black stripping pad fitted to a handheld Rotex random orbit polisher. After rinsing once again we found that all the limescale deposits and grout haze had been removed successfully.

The whole area was then dried off using a hot air gun and at this point the Slate had become pale and dry-looking after all the aggressive cleaning. Black slate is a type of oil stone which can often have its oil content stripped out by both chemical and physical cleaning.

Sealing Black Slate Bathroom Tiles

I had anticipated this issue however and the solution was to replace the lost oil in the stone using Tile Doctor Stone Oil which is a resin-based pre-polish sealer. It’s formulated to restore the slate’s attractive deep Black colour, improve the surface texture and seal against water absorption. I allowed the oil to soak in for a few minutes and then wiped off all excess product remaining on the surface before leaving it alone to cure for a couple of hours.

Once the oil had cured, the water resistance was then further enhanced by the application of a coat of Tile Doctor Ultra-Seal which is a penetrating sealer designed for both interior and exterior applications. Finally, once the topcoat of Ultra-seal had dried, with some assistance from an industrial fan, the surface was buffed to a rich sheen using the Rotex polisher and a white nylon pad.

Slate Shower Cubicle After Renovation Attleborough

The client was very impressed by the finished result and hadn’t realised that her slate tiles actually had some flame-like pattern variation in their surface which had always been hidden before by the grout haze and limescale deposits.

For the aftercare of shower tiles, especially stone I recommend regularly spraying on a product called Tile Doctor Aqua-Pro which is a mild cleaner designed for use where the tiling has been sealed. A lot of tile cleaning products you find are simply too strong for use on sealed surfaces and can erode the sealer over time.


Professional Slate Tile Restoration in a South London Wet Bathroom

Removing Grout Haze from a Black Slate Shower Cubicle in Attleborough Read More »

Limestone Floor Before and After Restoration Silfield

Revitalizing Limestone Floor Tile & Grouting in Silfield

Earlier this year I was invited over to a property in the village of Silfield near Wymondham in Norfolk to inspect a Limestone tiled floor. Now I don’t usually quote my clients, but this is how the owner of the property had described the floor in the enquiry I received from Tile Doctor.

“Grout Black, where tiles have divots, dirt is encased,
plus no shine to floor, sealant non-existent.”

The problems listed were quite comprehensive and having had chance to survey the floor we found them to be quite accurate and really could not disagree with her comments! The Limestone tiles had been laid throughout the Kitchen diner and it was clear the sealer had worn off completely allowing dirt to become ingrained in the Limestone tiles and especially the grout which had turned black.

Limestone Flooring Before Renovation in Silfield Limestone Flooring Before Renovation in Silfield

I understood from the owner that the grout lines should have been a pale cream colour rather than the black it was now, additionally the natural pitting in the Limestone was full of the same black contaminants. I ran a quick water test on the tiles to see if there was a seal present and it confirmed that if there had ever been one it was now completely compromised. The lack of sealer had allowed all liquid spills and dirt to soak straight into the tile making it dirty and exceedingly difficult to clean.

A large birthday celebration party had been planned and our client was desperate for the floor to be brought back to life beforehand. Although I couldn’t start immediately due to other commitments, it was able to return in time to get the floor clean for the party.

Deep Cleaning Limestone Tile and Grout

Our first job was to tackle the severe soiling trapped in the pits and grout lines. To do this a very strong dilution (2:1 ratio) of Tile Doctor Pro-Clean was applied to the floor and left to soak into the tile and grout for about 10 minutes. Then is was scrubbed into the tiles with help from a rotary buffer fitted with a soft/medium long-bristled nylon brush. The resulting slurry was then power rinsed with 60-degree hot water and extracted with our 400psi machine which jetted out all the black, oily contaminants from the grout and pits.

The floor was speed dried with the assistance of a large air mover. Once dry to the touch our attention was turned to filling the now exposed pitts in the Limestone tiles and two cracks with an appropriately coloured fast cure epoxy compound. Having allowed the filler time to reach full hardness, we ground down the excess material with 100 and 200 grit hand burnishing blocks in preparation for the next stage.

We find the best way to renovate the appearance of stone is to use a process called burnishing which hones the stone and beings up the polish. For this you need a set of 17-inch diamond encrusted burnishing pads. The pads fit the rotary buffer and are applied to the floor in sequence from 400, 800 and then 1500 grit using water to lubricate the process. The waster turns into a slurry as you work, and this is then rinsed off the floor with water after each pad and extracted using a wet vacuum. The floor was then left to dry thoroughly overnight with the assistance of our large capacity dehumidifier.

Sealing a Limestone Tiled Kitchen Diner Floor

Returning the following day, we thoroughly vacuumed the floor to remove any remaining powder and grit left from the previous day’s wet work before spray burnishing the surface with a Tile Doctor 3000-grit diamond pad. This last pad really beings up the polished appearance of the Limestone and gave the tiles a deep and rich shine.

This last pad is applied without water and so leaves the floor dry and ready to for a new sealer to be applied. Our sealer of choice was Tile Doctor Ultra Seal, it’s a premium penetrating sealer that soaks into the pores of the stone protecting it from within. Ultra-Seal doesn’t alter the natural appearance of the stone giving it undetectable protection from staining. Having allowed the sealed floor to dry with the assistance of our air mover, the whole area was buffed using a white buffing pad and a small amount of finely sprayed water to remove any light smearing before vacuuming once again to finish.

Limestone Flooring After Renovation in Silfield Limestone Flooring After Renovation in Silfield

My client was delighted with the result and left the following feedback for us:

“Totally renewed two flooring areas in our house to what looks like a recently laid floor. I have already had so many compliments without even telling people it had been professionally cleaned! Nick and Sue are always very easy to have about, inconspicuous and hard working. Absolutely delighted with the outcome and would recommend without hesitation. Thank you so much!”

For aftercare cleaning I recommended Tile Doctor Stone Soap, its designed for cleaning polished stone floors and will help build-up the patina. It’s a neutral pH product so won’t prematurely erode the sealer like many tile cleaning products you find in supermarkets which are really sold for cleaning glazed ceramic tiles not sealed natural stone.


Professional Restoration of a Limestone Tiled Kitchen Diner in Norfolk

Revitalizing Limestone Floor Tile & Grouting in Silfield Read More »
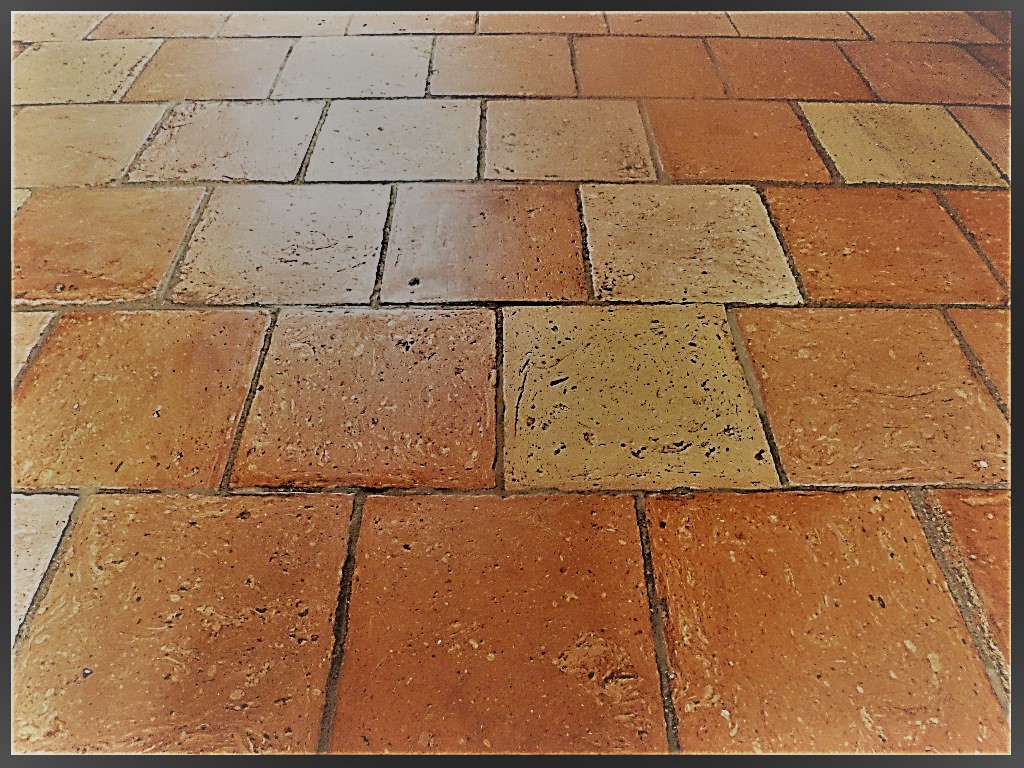
Restoring a Heavily Soiled Unfilled Travertine Floor in Attleborough

Restoring a Heavily Soiled Unfilled Travertine Floor in Attleborough

Our client got in touch from Attleborough a market town between Norwich and Thetford to ask for our help restoring her kitchen and dining area floor. If you live in the countryside and have children and pets, unfilled Travertine is probably not the best choice for your kitchen/diner flooring, which is the conclusion our client discovered for herself.

The floor was only around three years old, but the entire area had become heavily scratched and soiled. Most of the dirt was occupying the unfilled pits in the stone which are an inconvenient feature of this natural material. No amount of daily vacuuming, mopping or rinsing will ever shift this kind of contamination which is why she called us in desperation.

Travertine Floor in Attleborough Before Cleaning
During our site visit, apart from the obvious heavy soiling, we also noticed a very prominent and ugly settlement crack which had appeared along the French doors leading to a four mm difference between the surface levels either side of the crack itself.

Travertine Floor in Attleborough Threshold Crack

Cleaning and Repairing a Travertine Tiled Kitchen and Dining Room

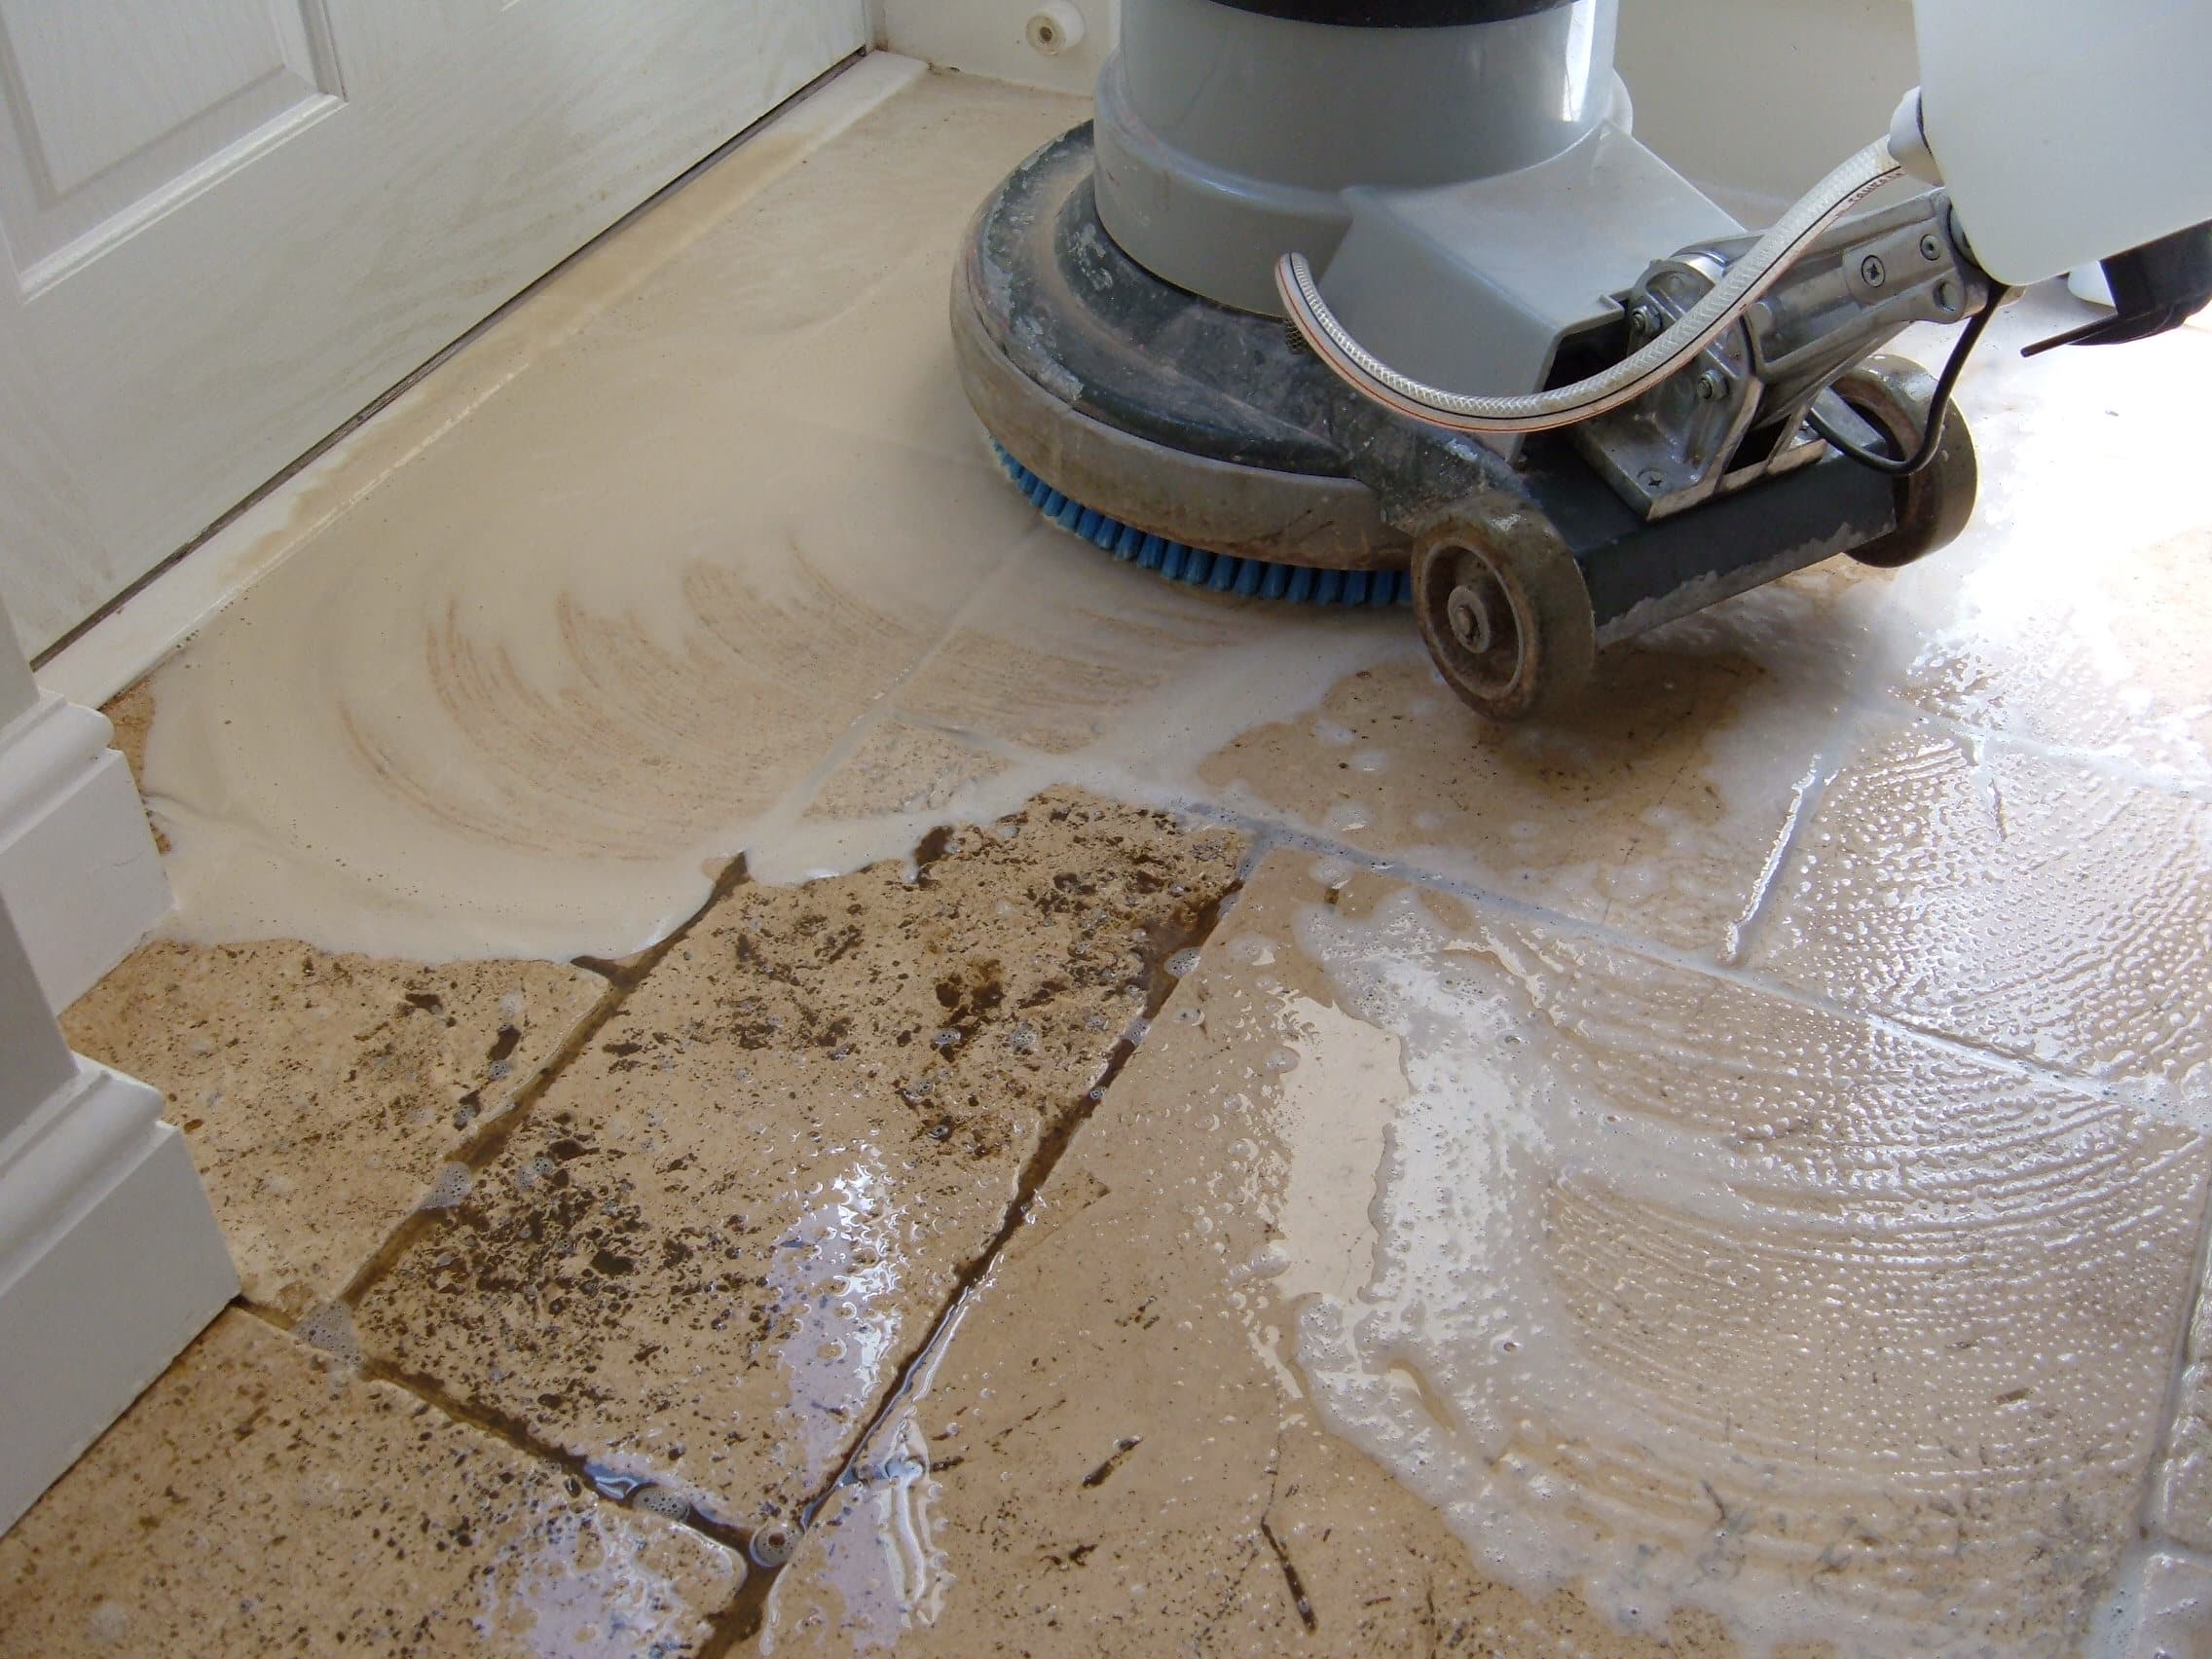
Our first job was to deep-clean the soiling from the floor using our heavy 17″ rotary machine fitted with a medium-soft brush and a 1:5 mix of Tile Doctor Pro Clean, diluted with very hot water. This combination made quick work of the surface dirt, along with the soiling in the grout lines. The resulting slurry was left to dwell on the floor for ten minutes to soften the residue sitting at the bottom of the pits before being power rinsed and vacuumed away using our 400psi hot water extraction machine. The machine was fitted with a specialist hard flooring wand which blasted the softened dirt out of the pits and immediately sucked all the contaminants up. This avoids anything spraying up the adjoining walls.

Having removed all the dirt, we then cut and polished the area again with the rotary machine but this time using Tile Doctor Diamond Burnishing Pads from 400-grit through to 1500-grit, rinse extracting between each stage to remove the resulting slurry. Internal corners were finished with hand-held diamond blocks. We then left the whole area to dry thoroughly overnight with assistance from our large capacity dehumidifier.

Travertine Floor in Attleborough Rotary Cleaning

Sealing Travertine Flooring in Attleborough

On our return the following day, we repaired the unsightly crack along the threshold by grinding the high lip down to the same lower level using a diamond blade fitted to our Bosch multitool. Followed by polishing with our Festool Rotex 90 Handtool. The crack, being rather wide, was then filled with a two-part epoxy stone repair compound and levelled with the Rotex after curing.

Travertine Floor in Attleborough Crack Repaired
After this, the floor was vacuumed thoroughly followed with the application of the a very fine 3000-grit diamond burnishing pad which is applied to the floor with a little water spayed onto the tile. This fourth and final burnishing pad really builds up the shine on the floor.

Travertine Floor in Attleborough Deep Cleaned
Our client really loved the new lighter look of her cleaned Travertine floor, so we chose to use Tile Doctor Ultra Seal to seal the floor and protect it from staining. Ultra-Seal is a matt impregnating sealer that soaks into the pores of the stone protecting it from within and without affecting the colour of the substrate. The sealer was liberally applied and allowed to be absorbed by the stone for a few minutes before the excess was removed. After an hour, the surface was re-burnished with the 3000-grit diamond pad and then vacuumed to remove any fine dust generated during the burnishing.

Our client was really happy with the improvement and left the following comment when we’d finished…

“Our travertine floor had suffered over the winter and I wasn’t totally convinced that anything would save it. However, it has been completely transformed and we are delighted with the results. Nick was professional and thorough – could not recommend more!”

Travertine Floor in Attleborough Cleaned and Sealed
 

Cleaning and Repair of Travertine Kitchen and Dining Room Floor in Norfolk

Restoring a Heavily Soiled Unfilled Travertine Floor in Attleborough Read More »

Restoring an 18th Century Norfolk Pamment Tiled Floor in Wymondham

Restoring an 18th Century Norfolk Pamment Tiled Floor in Wymondham

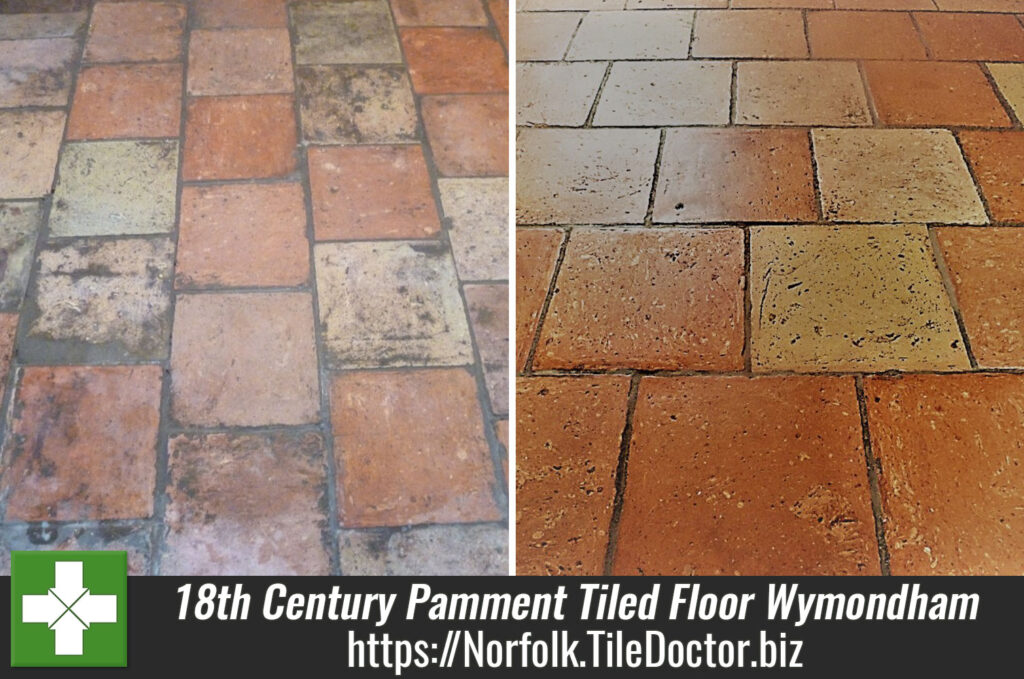
The client’s requirement for this particular job was to clean and restore a very old and porous Pamment tiled floor in the dining room of an old house in the Norfolk Market town of Wymondham. My client impressed upon me the need to restore the floor without removing any of its considerable character and to provide a high degree of fluid and stain resistance which I was confident would not be an issue having worked on similar floors before.

Pamment Dining Room Floor Tiles Before Cleaning Wymondham
The floor originally dated from the late 18th century and had clearly suffered many years of abuse and neglect; there was evidence that at one time, the entire area had been covered by linoleum which appeared to have been stuck down with a type of hide glue, leaving large patches of the adhesive firmly stuck to the surface of the tiles.

Pamment tiles are very popular in Suffolk and Norfolk homes and I often come across them; they are made from clay and, like Terracotta, are porous and therefore need to be sealed to prevent ingrained dirt. Pamments are quite versatile however and can be used for internal floors and external surfaces like patios.

Cleaning a Pamment tiled floor

The first stage of the renovation was to apply a strong dilution (1:2) of Tile Doctor Pro-Clean to the whole area which was scrubbed in with a rotary machine fitted with a black scrubbing pad. The resulting slurry was power-rinsed and vacuumed away using our Ninja machine which makes light work of these tasks.

Tile Doctor Remove & Go was then applied to the remaining patches of paint and glue and allowed to remain in contact for thirty minutes before being scrubbed again with the black pad and rinsed with clean water. A few particularly stubborn glue patches were finally dispatched by steaming after the application of Tile Doctor Nanotech HBU Remover. The cleaning being complete, the odd bits of missing pointing were replaced using a grey-coloured fast-cure compound and the whole area was left to dry thoroughly overnight with the assistance of our large capacity dehumidifier.

Sealing a Pamment tiled floor

Returning the following day, the floor was tested for moisture content using a damp meter to ensure that the chosen sealer’s performance wouldn’t be adversely affected by the presence of too much water in the substrate, particularly bearing in mind that there certainly wouldn’t be a damp proof membrane present in a floor of this age.

The dehumidifier has done its job and I was able to start the sealing process with a single coat of Tile Doctor Colour Grow which is an impregnating sealer that works by occupying the pores in the tile so dirt cannot. Colour Grow is also a moisture-tolerant, breathable sealer that has the additional benefit of enhancing the colours within this kiln-fired tile without affecting the look and feel of the surface.

Our clients had said that they would prefer a slight shine to the flooring if possible, so a further three coats of Tile Doctor Seal & Go were then applied to the whole area which provided maximum fluid resistance with a mid-sheen finish which would make daily cleaning much easier and more effective.

Pamment Dining Room Floor Tiles After Cleaning Wymondham
The client was really pleased with the transformation and left the following comment.
“Almost unbelievable; the results are far beyond what we hoped might be possible with our badly neglected dining room floor. Many, many thanks.”

Deep Cleaning and Restoration of Old Pamment Tiles in Norfolk

Restoring an 18th Century Norfolk Pamment Tiled Floor in Wymondham Read More »

=================================

Norfolk Tile Doctor

================================= Read More »

Scroll to Top